")
Part of the enjoyment of film photography these days is the range of cameras available at ridiculously cheap prices. It truly is a golden age for the vintage camera lover.
The downside of owning and using a number of cameras is you never get to deeply know and understand each machine, and how to get the best from it.
Because of this I’ve started making a small sticker for certain compact cameras with three simple items of “machine code”, to give me a better chance of eking out the most pleasing images with it.
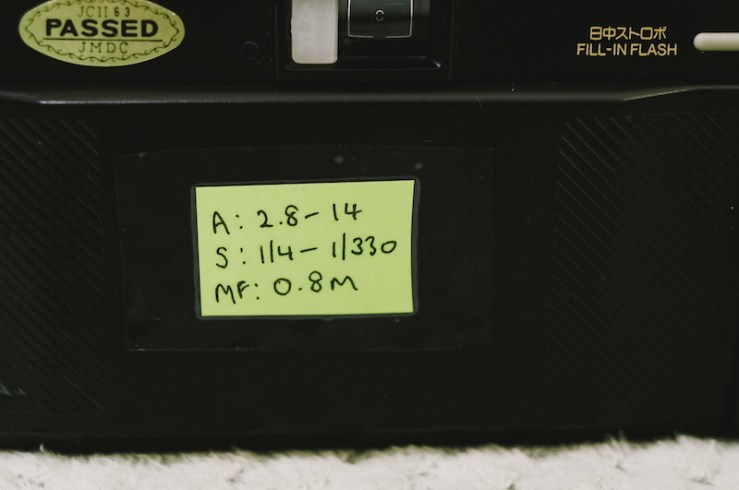
Here’s an example of what the machine code notes look like –
I use my knowledge and experience of the Sunny 16 rule to aid with this approach too, in the same way I use it to shoot without a lightmeter in fully manual cameras.
The three codes, what they mean, and how they help, are as follows –
A is for Aperture
The numbers noted are the max and min aperture the camera is capable of. On SLRs and the like, obviously this is stated on the lens, so this system is mostly for compact cameras with Auto Exposure (AE), where the aperture range isn’t visible.
Knowing the max aperture is helpful in lower light. Some cameras have a low light or flash warning light come on to aid with this.
Knowing the min aperture is helpful on bright days, especially with faster film. The info is more useful in conjunction with the next note.
S is for Shutter Speed
The shutter speed range of the camera. As with aperture, this is useful to know in low light and bright situations especially.
If the camera has a max aperture of f/2.8 and max shutter speed of 1/2s, then you know you can shoot in really low light and still get a properly exposed image. If it’s f/5.6 and 1/125s, then you’re far more limited.
On the flipside, if you know a camera has a min shutter speed of say 1/45s, then you can confidently shoot without really worrying about camera shake – it can never go below that minimum shutter speed. As long as the light is sufficient for the exposure.
On the other end of the scale, if the max shutter speed is say 1/125s, and the max aperture is f/8, you need to be careful when shooting fast film, say ISO400 or ISO800 film on a bright day, as the camera is likely to max out and overexpose.
For these reasons you might think twice about taking certain cameras out on very bright or very dull days, and save them for when conditions where they’re more likely to perform well.
MF is for Minimum Focus
This is the minimum focusing distance of the camera. Many of the cameras I’m using this system for are Auto Focus (AF), and whilst some have a visual warning when the camera can’t focus (usually a rapidly flashing green light, rather than a steadily fixed one), many don’t.
If you think the camera is focusing correctly when you’re shooting at around 0.5m say, but it turns out it isn’t because it can’t and you forgot its minimum focus was only 1m, it can result in a very frustrating roll of blurred images.
With fixed focus cameras, it’s also useful, for similar reasons – you’re not likely to get sharp results trying to focus on something 0.5m away, if the recommended min focus is 1.5m.
With the best equipped cameras, these notes are less useful.
These cameras have a wide enough range of apertures and shutter speed to cope with virtually all lighting conditions – they were specifically designed that way. Plus they have a very close min focus and a visible warning when you’ve gone closer and the camera can’t focus.
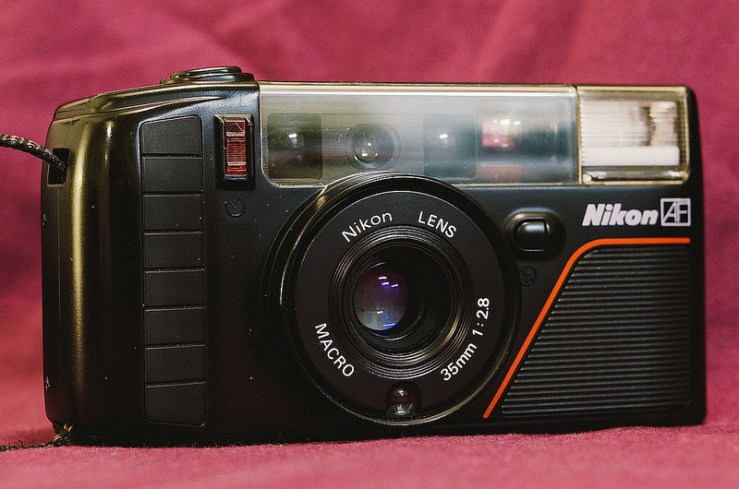
An excellent example is my Nikon AF3, which is fast becoming my favourite AF compact. It pretty much does everything you want, and in a logical, cooperative way.
Sometimes though, logical and cooperative can get a little repetitive and dull.
With more limited cameras, the challenge is greater to get a keeper of a photograph, but often the fun and enjoyment is greater too.
Creating a memorable image with a cheap hunk of plastic can be far more rewarding than doing the same with a sophisticated SLR with a stunning lens and foolproof metering.
On to how these machine codes work for me in practice.
Here are three examples of cameras with these notes, and how they specifically help in each case.
Fuji DL-300
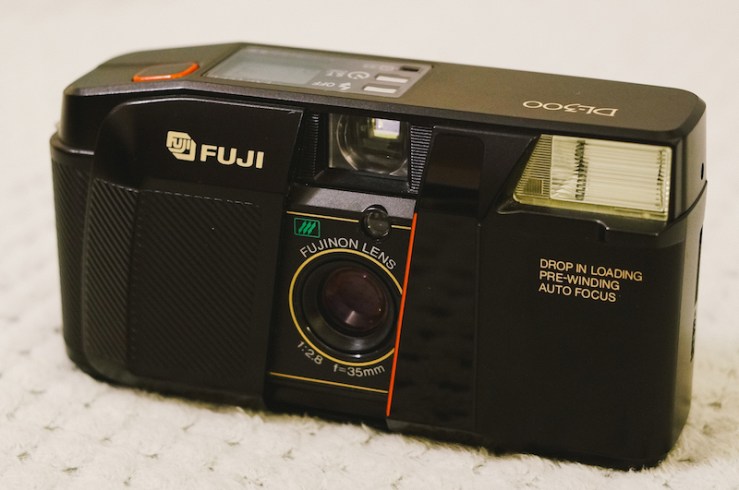
This Fuji is one of the best equipped of the classic 35/2.8 compacts I’ve used, and the machine codes reflect that. It’s not dissimilar to the Nikon AF3 in spec.
The aperture range is wide, as are the shutter speeds. With ISO400 film on a sunny day, f/11 and 1/500s would be required, and with f/14 and 1/330s the DL-300 is close enough for accurate exposures.
On a very overcast day where you might need f/2.8 and 1/500s the Fuji has even more latitude, with the minimum shutter speed of 1/4s being some seven stops over this. You could virtually shoot in the dark!
The camera has a built in flash, and thankfully a button to switch it off. So you would assume that with the flash off, in dark conditions the Fuji would default to f/2.8 and use the required shutter speed.
The MF code in this case is of less use, as the Fuji also, like the best equipped AF cameras, flashes the AF confirm light when it can’t focus. You just focus a little farther away and try again until the focus light stays lit, then you know focus is locked.
Halina Junior G

The Junior J is very basic, very plasticky, has a fixed shutter speed of 1/100s and a fixed focus lens. It reminds me very much of a 35mm version of the Holga 120. This is a good thing!
Surprisingly the Halina does have a range of apertures, albeit limited to three.
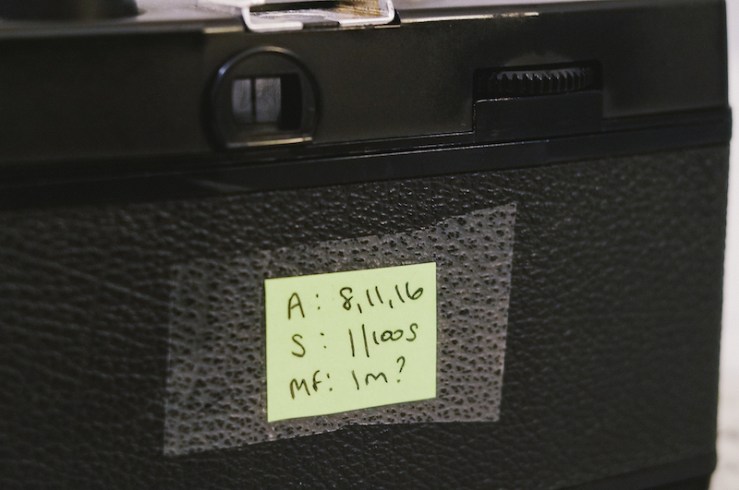
From knowing the shutter speed was 1/100s, and noting the handy weather symbols on the barrel of the G, I calculated the apertures to be f/8, f/11 and f/16, and internet knowledge confirmed this.
With ISO100 film on a sunny day, you might likely use f/11 and then point and shoot.
With that aperture, the lens should be sharper and give a larger depth of field than using f/8. You could even push to f/16 if you wanted even more depth of field, which would of course also be forgiving with the fixed focus lens.
As I found with my AgfaPhoto Vista Plus 200 experiment, most consumer films with their -1/+3 latitude still give respectable pictures within this range.
Most fixed focus plastic compacts like this have a “sweet spot” around 3m, and greater depth of field obviously means more either side of this sweet spot is in reasonably sharp focus. Hence my “1m?” Min Focus – at f/16 objects at 1m would likely be fairly well in focus.
On a heavily overcast day, where according to the Sunny 11 rule you might need f/4, you might think the Halina is useless with its maximum f/8 aperture.
But with ISO400 film, you’d still be in a usable range.
If at 1/500s you need f/4, remember the fixed shutter speed of the Junior G is 1/100s, approximately two stops slower. In other words, with your shutter speed two stops slower, you can have an aperture two stops smaller, and get the same exposure.
So with the Halina, and ISO400 film, f/8 and 1/100s in overcast weather should still yield usable photographs.
I, or you, could of course write out all these permutations, but really you only need the simple machine codes and a knowledge of Sunny 11 (or write that out on a small card like I used to have) and even with such a simple camera, if you intelligently use ISO100, 200 and 400 (and even 800) film you have quite a wide range of situations in which to shoot usable images.
Pentax PC-330
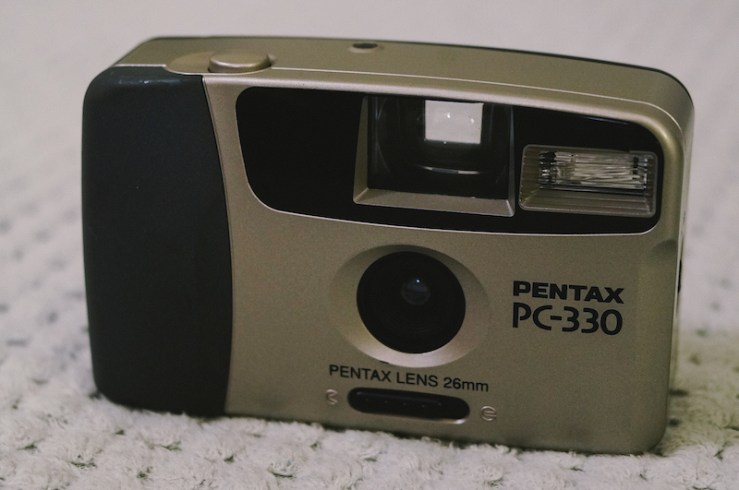
An even more basic camera which might not have much appeal to many with its fixed focus, fixed aperture and fixed shutter speed.
But the little Pentax has, in my view, two trump cards.
First its super large and bright viewfinder. The only compact camera with as big a VF is my Minolta AF50 Big Finder. Hence its name.
Every time I hold the PC-330 up to my eye I smile – you almost forget you’re looking through a VF. One go with one of these and you’ll probably never return to the horribly pokey dark tunnels that pass as viewfinders on virtually every zoom compact made after 1985.
Its second ace is the width of its lens.
At 26mm (or 25mm, according to the manual!) you have not only the ability to fit much more in the frame, but a vastly greater depth of field than with, say a 35mm lens.
According to the very useful DOF Master site, with a 26mm lens, with your subject 3m away (I’m assuming the fixed focus of the Pentax is approximately 3m), and at f/6.3 (the fixed aperture of this camera), everything between 1.63m and 18.5m will be in focus! With this range, who needs AF?
With a 35mm lens in the same situation, the depth of field would only be 2.05m to 5.57m. Still very usable if you’re careful, but nothing like the vast DOF you get with that little 26mm lens.
Aside – I also have a Superheadz Olive San which takes these to even greater levels. Its f/11 fixed aperture and insanely wide 22mm lens mean using the same 3m focus point, everything between 0.97m and infinity is in focus! The manual suggests the focus range is 1.2m to infinity, so reverse engineering these figures on DOF Master, the “sweet spot” of the lens is around 7m, for those who have one, or are thinking of getting one. Again, it pretty much eliminates the need for AF entirely.
Back to the Pentax PC-330, and the machine codes look like this –
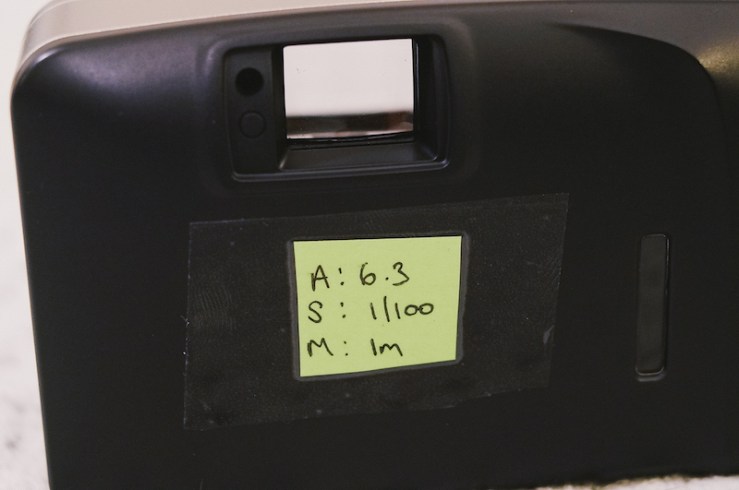
I can use similar calculations as with the Halina, then choose the best film depending on the conditions to get the best from the camera. The Pentax has a slightly faster lens – f/6.3 to the Halina’s maximum f/8 – so can be used in slightly darker conditions.
You could feel confident using the PC-330 with ISO400 film on a sunny, hazy sunny or partially overcast day.
I would always rather over expose than under (remember the latitude of -1/+3 of most consumer films) so even on a bright sunny f/11 day, with ISO400 film and base settings of f/11 and 1/500s, you’re only going to be about three stops over exposing with the Pentax and its fixed f/6.3 and 1/100s settings. Modern consumer film should absorb that over exposure in its stride.
I would likely hedge my bets and use ISO200 film with the PC-330, knowing that the relying on the film’s latitude I’d be fine in conditions from bright sun to fairly overcast, and have a camera that keeps everything from around 1.5m to 18m in focus.
Hopefully these real life examples have helped explain this system better and how it helps.
If you took a very capable camera like the Fuji DL-300, loaded some ISO100 film and went out in any conditions from the brightest sun to dusk you’d get usable results.
Do the same with the Pentax PC-330 though say, and you’d likely be ok at the sunny end, but when the light was poor the film would be underexposed and you’d likely have a roll of horribly grainy and near unusable images.
On the opposite side of this though, with simpler cameras with fixed aperture, shutter speed and focus, you ironically have more control.
You know that on a reasonably bright day, if you point the Pentax PC-330 at a person slowly walking by about 5m away and press the shutter button, the depth of field will be enough to mean they’re in focus, and the 1/100s shutter speed should freeze their motion on film.
In the same situation with a more sophisticated AF, AE (Auto Exposure) camera, you don’t know a) if the AF will lock on the right person quickly enough, and b) if the camera will choose a fast enough shutter speed to freeze their motion.
If the camera chooses a large aperture and fast shutter speed, you’ll have the motion captured but lose depth of field, meaning any focus errors will be further exaggerated.
If the camera’s AE goes the other way and chooses a small aperture for maximum depth of field, the shutter speed might be 1/30s say and your subject will be a ghostly blur.
With most AF, AE cameras you don’t really know what it’s doing until you see the final photograph.
Plenty of food for thought in how simple and uncontrollable these basic cameras are, or are not, compared with AF, AE cameras after all.
A final tip on where to find the three details you need for these machine codes, if you want to try something similar yourself.
There are essentially two sources – the camera’s manual, or a review on a website.
Quite often you’ll be fortunate to get a manual with the camera, but if not, Mike Butkus is an amazing resource.
Almost as valuable is Derry Bryson, though all of his manuals seem to use the US name of the cameras, so if you don’t have the same US version of the camera (like me in the UK where the Olympus Mju range is not known as Stylus, and the Pentax zoom range is called Espio, not IQZoom) you’ll need to do a bit of research first to find out your camera’s equivalent.
In some cases, the manufacturer’s own websites still have the basic specs you need.
The Canon Camera Museum is excellent (there were no shortage of very capable and fun to use Sure Shots in the 80s), and the archives of Olympus and Nikon still have much usable info. Ricoh Japan also has a substantial history of their compacts (just have Google Translate switched on automatically, unless you’re fluent in Japanese).
As I said at the beginning of this post, you could just pick up one of the classic 35/2.8 80s compacts like a Nikon AF3, Canon MC, Ricoh TF-900, Minolta AF-S or similar and get great shots in almost all situations.
But if you like a bit more of a challenge, and to keep alive that wonder of how a tiny plastic box with the most minimal of moving parts (and often no batteries!) can still produce memorable images, then these machine codes should help you towards making the best photographs you can.
Thanks for reading. Please share this post with others you feel will enjoy it too.


Another great read, thanks loads 👍🏻
Thanks Stu, glad you enjoyed it. I plan to write a follow post or two featuring photographs from some of the cameras mentioned, that will hopefully show how the system works.