
One of the major reasons I love film is the experiments you can try that have no direct digital equivalent.
Shooting redscale film is an excellent example.
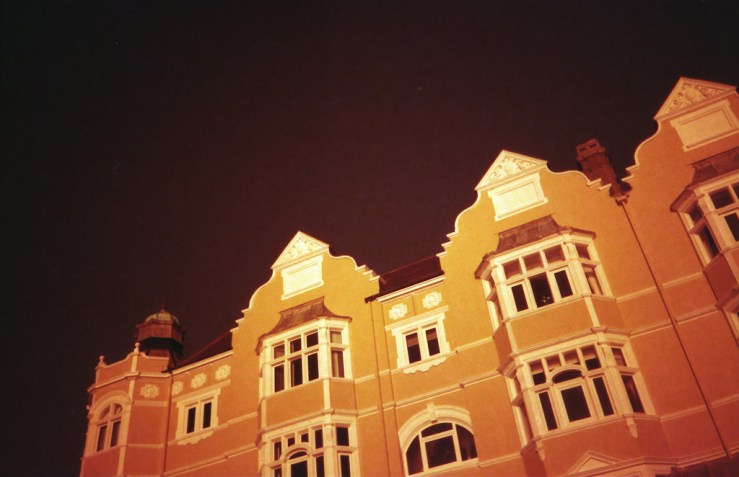
You’ve probably already seen redscale images, that look monochrome, but with a burnt orange red as the base colour rather than white.
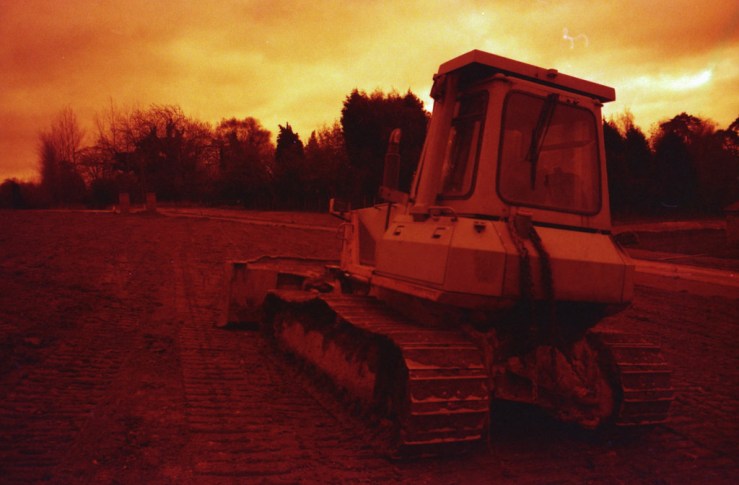
These photographs are obviously distinctive overall, but redscale remains one of the more unpredictable and exciting aspects of film, along with cross processing (x-pro), shooting expired film and film soups.
But although the photographs appear dramatic, radical, and otherworldly, the process of creating redscale film is actually very simple.
You could go out and buy pre-made redscale film off the shelf, and pay £5-10+ per roll for the privilege. Or you could, like me, ever the cheapskate, make your own from cheap consumer film like AgfaPhoto Vista Plus 200, costing £1 a roll at Poundland.

You’ll notice from the above shot also, that redscale doesn’t always have to be those extreme fiery oranges. It can be more subtle graduations too. More on that later, but first, what redscale film is.
Essentially, redscale is regular film that is exposed on the wrong side. So to make your own, you need a canister of film that’s been loaded back to front. Easy.
What you need
A roll of fresh film, a donor film canister, some scissors, some sellotape, a dark room.
How to make the redscale film
First, take your two rolls of film.
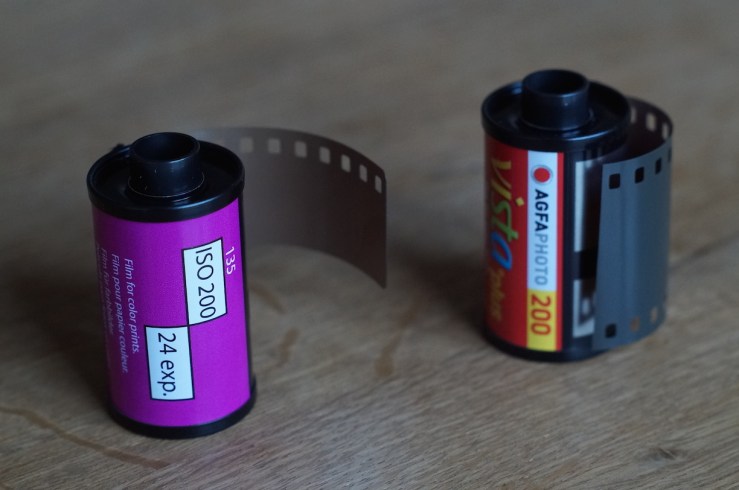
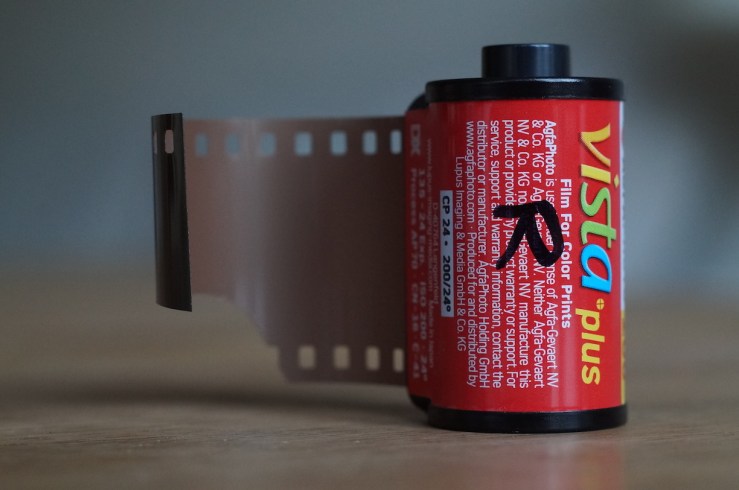
The purple roll on the left is the fresh roll of film. The red roll on the right contains just a few inches of film, still attached inside the canister. You can’t pull any more film out than is showing here. This is the donor canister.
The easiest way to get a donor canister is sacrifice a roll of film the first time you try this, by pulling it all out and cutting it off to leave just those three inches or so at the end.
After you’ve done this once, you will then always have a new donor canister at the end of making the redscale film – you won’t need to sacrifice a fresh roll of film every time.
Next, cut the leader from the fresh film so you have a vertical straight edge. Keep the offcut, you’ll need this later.

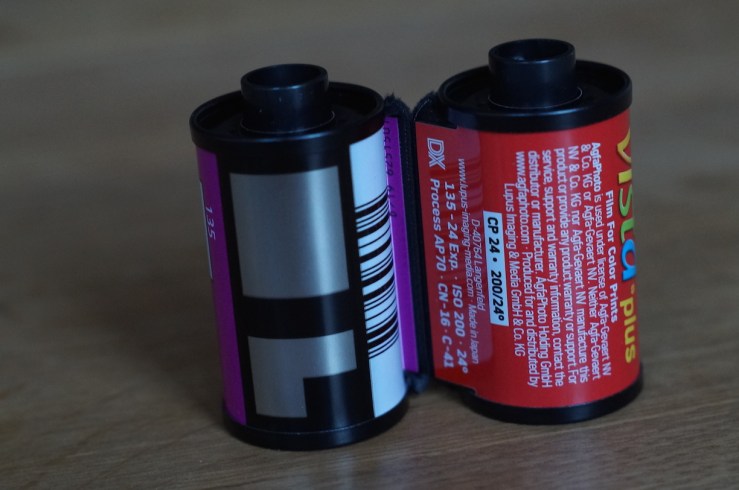
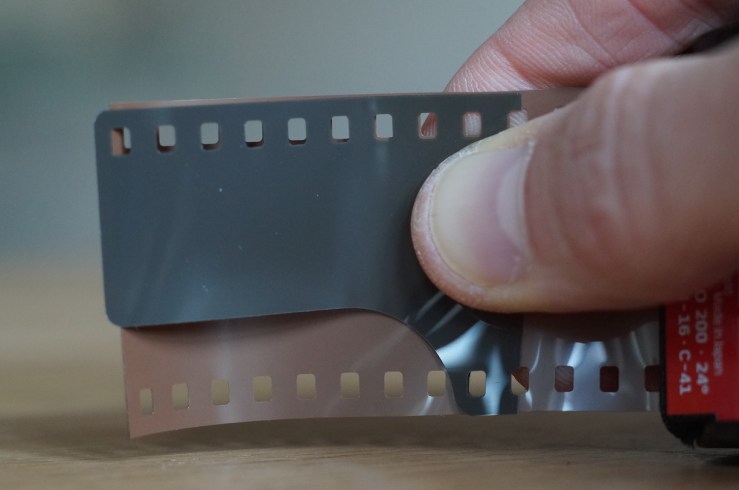
Then with the fresh film and donor film canisters the same way up, overlap maybe three or four sprocket holes and tape. It helps if you try to keep the film neatly aligned top and bottom.

Notice that one film has its regular side facing us, the other its reverse. This is obvious with any colour negative film – one side is a dark grey, the other brown. Because redscale film is regular film flipped over, it’s essentially we join the films with their opposite sides showing like above.
After the joining, wind in the donor spool (the red one that is currently empty) so the two canisters touch and you can’t see the film.
You can do the next part anywhere that doesn’t have strong light present. If you’re nervous, go to a dark room.
I’ve done this with my arms the wrong way down the sleeves of my jumper in a field on a sunny day, and it’s worked perfectly, so don’t worry too much. Especially if you keep the two canisters close together like the image above, so there’s little chance of light getting in.
Wind the red donor roll in with your finger and thumb until it won’t wind anymore. Then, back in the light, pull a little film out again so you can see it between the two canisters.
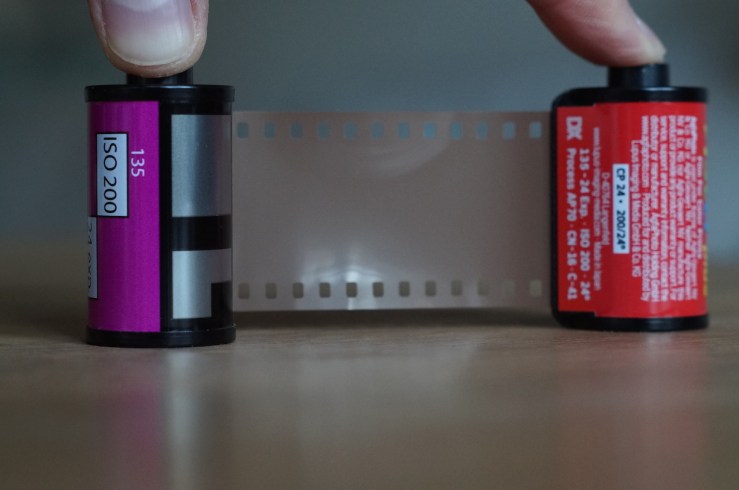
Then simply cut down the middle, leaving a few inches on the new donor roll, ie the purple roll that has just been emptied of film. This is then ready to be donor next time.
With the redscale roll (here the red one) which now contains all the film, use the leader you cut off at the start as a template to cut a new leader. The longer part of the leader is always at the top end of the canister where the knob sticks out.
 Now you have your new freshly rolled roll of redscale film. I find it useful to mark an R on the side to remind me it’s redscale.
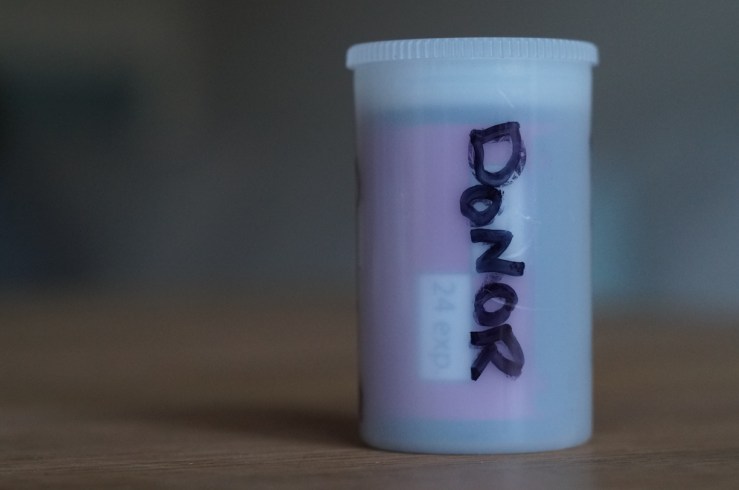
 Pop your other, now empty canister in a pot and write “donor” on it, ready for next time.
How to shoot redscale
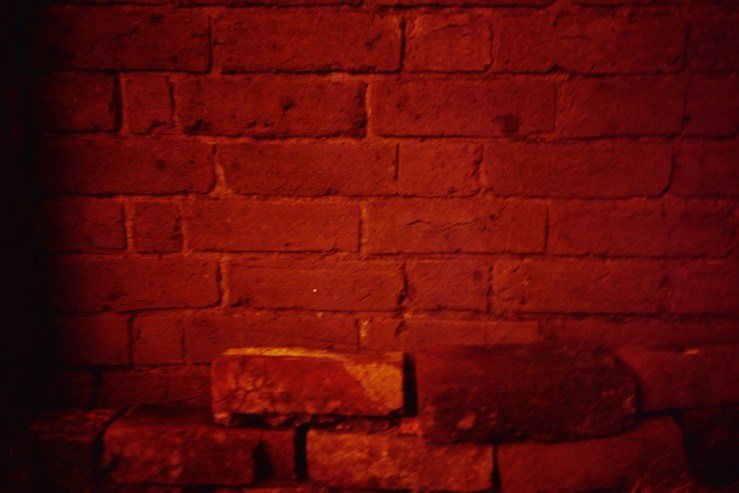
As I mentioned at the outset, redscale photographs are typical intensely red and orange.
But once the novelty of that vivid effect wears off, you’ll likely want to explore the more subtle graduations. Especially as over exposing redscale film a few stops gives a lovely subtle vintage feel.

Different films give different intensities of red. AfgaPhoto Vista Plus 200 (which is rebranded Fuji C200) works very well.
At box speed it gives vivid reds and oranges, and over exposed three or four stops gives the kind of tones as above and below. I’d recommend using a camera with manual ISO control, so you have this creative control.
Ferrania Solaris 200 gives very red results, even if you overexpose it a few stops.
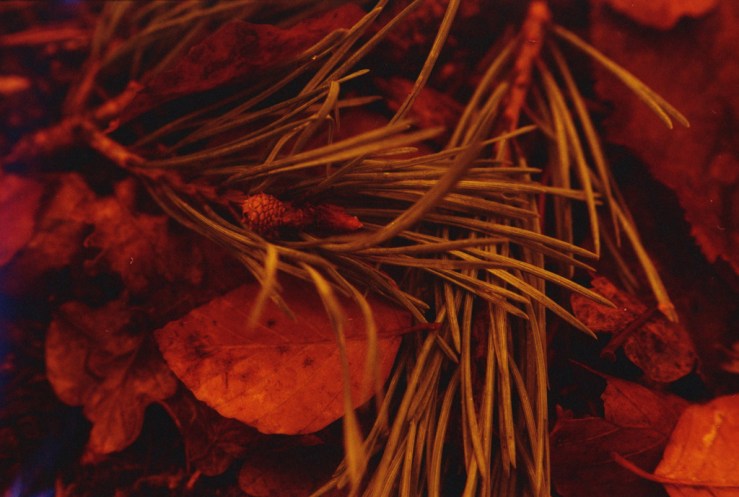
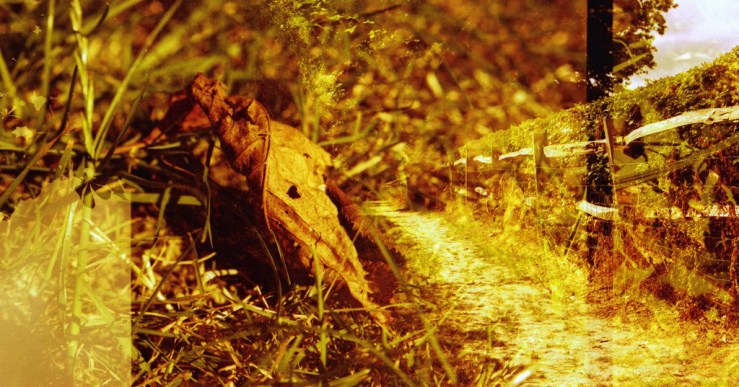
Solution VX200 (rebranded Konica VX200) gives very interesting greens and yellows.
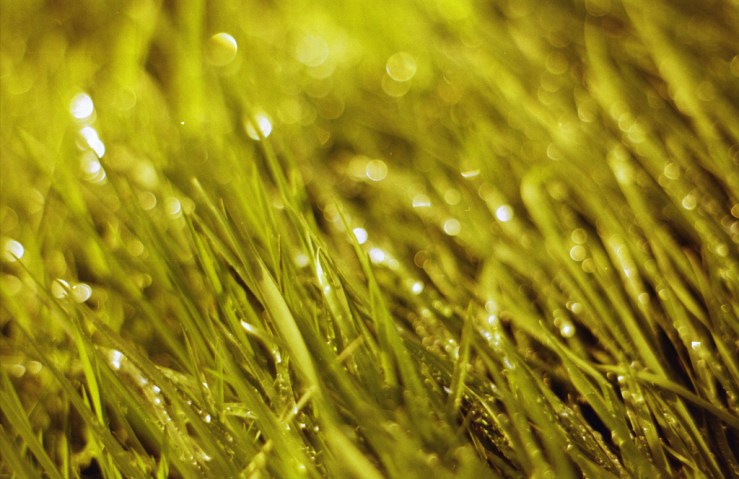
Especially when combined with multiple exposures. It’s like autumn in a canister.
Hopefully you found this guide easy to follow and are inspired to try your own redscale, if you haven’t already. It’s a unique, rewarding and often surprising way to make the most of film.
Please share your thoughts, experiences, and any questions, in the comments below.
Thanks for reading. Please share this post with others you feel will enjoy it too.


This looks wonderful, I’ll have to try making some myself! I presume it’s the amber base layer that gives the red colour, and the variations of this base between brands which give the differing results.
Am I right in thinking that to over expose the film you’re setting the film ISO on the camera lower than it’s ‘box’ rating, so as to make the camera treat the film as though it were less sensitive? I.e. setting to 100 for a 200 rated film?
It seems counter intuitive to overexpose to get a more subtle effect, but I suppose it means that more of the other colours of light, which are mostly blocked by the amber base, are able to pass through.
Anyway, sorry to ramble! Thank you so much for sharing!
Hi Tobias, yes I don’t know the exact science but I believe you’re right. The longer you exposure the film, the more you get through to the natural surface (the side of the film we should be exposing), so the more “normal” the colours look.
If you want vibrant reds and oranges go with box speed. To get very subtle tones try 3-4 stops over.
Yes the way I do this is just to change the ISO dial, so for those subtle tones with ISO200 film shoot at ISO25 (3 stops over) or ISO12 (4 stops over).
Above all just experiment and see what you like best! If you can get Fuji C200 / AgfaPhoto Vista Plus 200 (they’re the same film), not only do they work very well as redscale, they’re one of the cheapest films too!
You might want to try EBS (Expose Both Sides) too…
Hi Dan,
Yes, it seems likely to be, at least in part, how it works. I do wonder though how, and how much, it differs from using a red filter? Which makes me suspect there may be more to it. Regardless, it does work, and the results look striking!
Anyway, thank you for clarifying that for me! I can’t wait to have a play with it! I got some empty film ‘cartridges’ from my local lab with some tail sticking out, so I’ll make some as soon as I finish the roll currently in my main camera. And I’ll look out for some of the film you recommend too. I don’t think I’ve got any of that in my little stock at the moment.
Oh yes of course! EBS looks particularly striking, with the way the redscale and the regular exposure contrast and blend. Quite unpredictable, but I suppose that’s half the fun haha!
Thanks again!
I think redscale is much more unpredictable and fun than just using a red filter. : )
I’ve done a few measured experiments with redscale too where I’ve shot the same scene four or five times, starting at box speed then going down a stop each time, then comparing the results when its processed. Then repeating for a different composition.
Once you do this for one film, you get a good idea of how it will behave as redscale and the ISO setting you preferred most. It’s well worth investing a roll of film in.
EBS is brilliant fun. Shoot the normal side first, then wind the roll almost all the way back in, leaving the leader out. The follow the instructions for redscale film as if this was a new film.
Remember that with redscale because you’re flipping the film everything will be backwards on the scans so you’ll need to flip back when you have the digital images.
And if you do EBS and photograph letters or numbers on both layers, one layer will of course be backwards compared to the other, so you might want to avoid that. Or not!
Enjoy Tobias!
I’m so sorry Dan, for some reason wordpress hasn’t been notifying me of replies! I kept meaning to come back and check, but only just got around to it.
Haha Yes, you’re probably right! I certainly enjoyed the slightly anarchistic idea of taking something and using it ‘wrong’.
I’ve only done one roll so far, but the results were certainly striking! I did mostly landscape studies, clouds and the sea etc. But at some point I might have another go and see what happens if you use it for portraits. I’m interested to see how skin tones come out!
It’ll have to wait though, because I’m busy setting up a darkroom! Ooh the excitement haha!
Anyway, thanks again Dan!
Do try an Expose Both Sides (EBS) roll too. And make one side a stark contrast to the other, for example the redscale side could be landscapes, and the normal side portraits. It can make for some very unpredictable and memorable photographs!
[…] Redscale Film – How To Make And Shoot Your Own […]
[…] true in my earlier film days, when I was keen to learn some of the unique ways film can be used. Making redscale film, cross processing, multiple exposures and film soups were a few of the approaches I discovered and […]
[…] loved experimenting with expired film, deliberately under- and over-exposing, making my own redscale film, cross processing, and making multiple exposure images, to name a few […]
Hi, I read somewhere that another type of experimentation, is to place some reflective material (ie kitchen foil?) between the camera film pressure plate and the film itself, thereby exposing the film from two different directions at the same time. Exactly what effect that would have on the image, if any at all, is beyond my imagining. Has anyone tried this process, or am I barking up the wrong tree 🙂 ? Cheers Ian
It’s worth a try Ian, see what happens. But since the lens is only one one side, surely there is no image to capture on the other side, other than the silver foil. Let us know if you give it a try!