
Inspired by Lisa Marie’s wonderful cyanotypes, I’ve been looking back over some of the film photography experiments and alternative treatments I’ve tried and enjoyed.
Here are a few, a brief description of my approach, and a sample image or two for each.
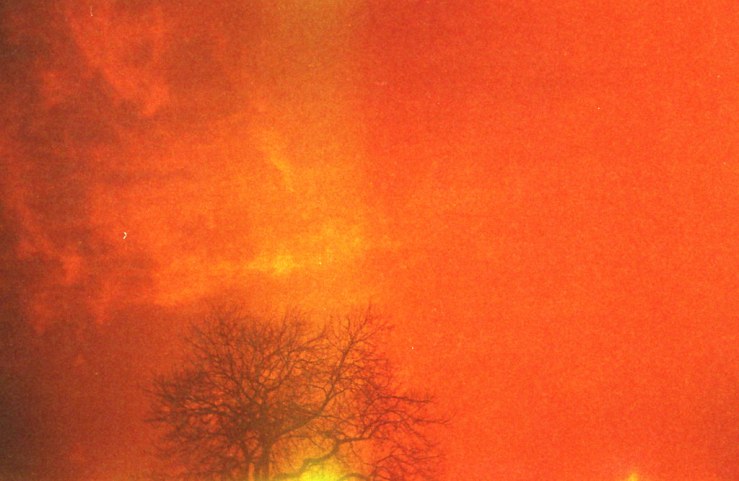
Redscale
Put simply, the film is reversed so light hits the back of the film first. I understand that this is the red layer, hence why images appear in red monochrome. The longer you expose, the less red the effect.
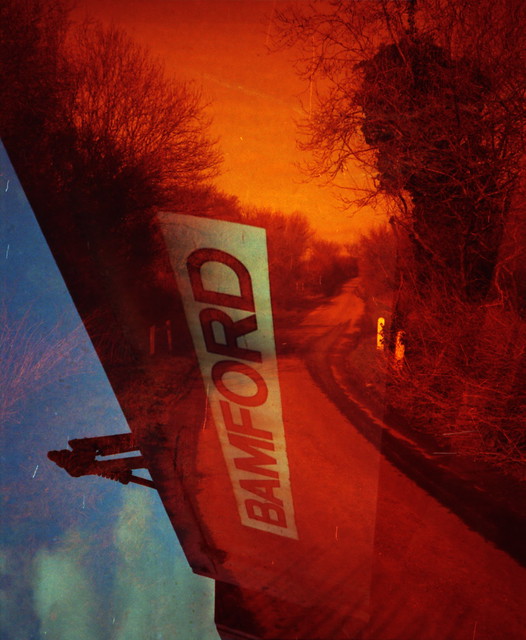
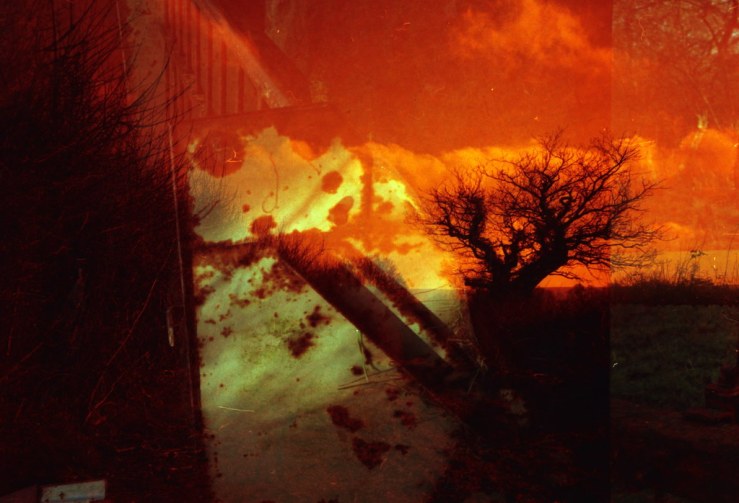
At one end of the spectrum, I’ve enjoyed some very red apocalyptic looking redscale, like this –
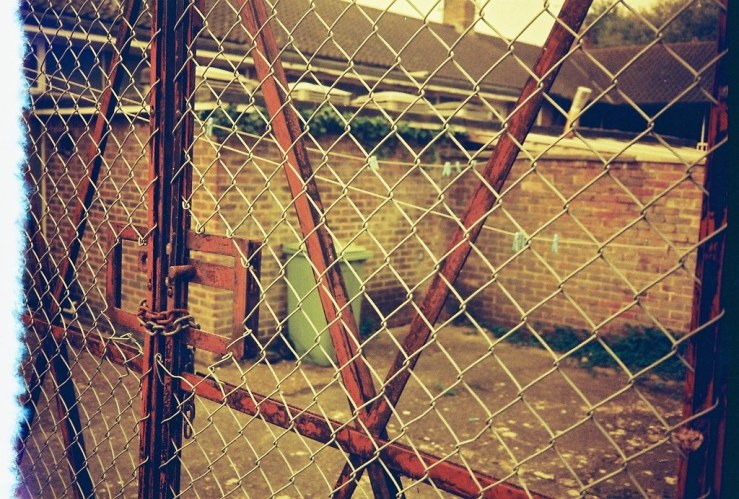
More often I explored far more subtle tones, this one achieved by shooting ISO200 redscale film at ISO25, ie three stops over exposed.
You can buy ready made redscale but I preferred the much cheaper approach of taking AgfaPhoto Vista Plus 200 from Poundland (£1 a roll!) and making my own DIY redscale film.
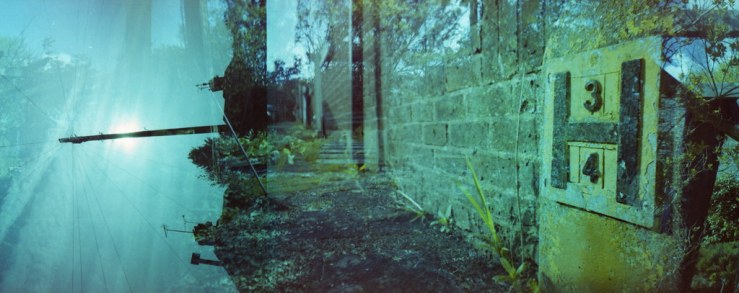
One Film Two Cameras
This is as straightforward as it sounds. Shoot a roll of film in one camera, then at the end, rewind as usual, but leave the leader sticking out, so you can load it into a second camera and shoot another layer of images over the top of the first.
I’ve had best results here where I’ve chosen a theme for each layer, say landscapes, then people, or close ups, then streets. Otherwise the overlaid images can be overly messy.
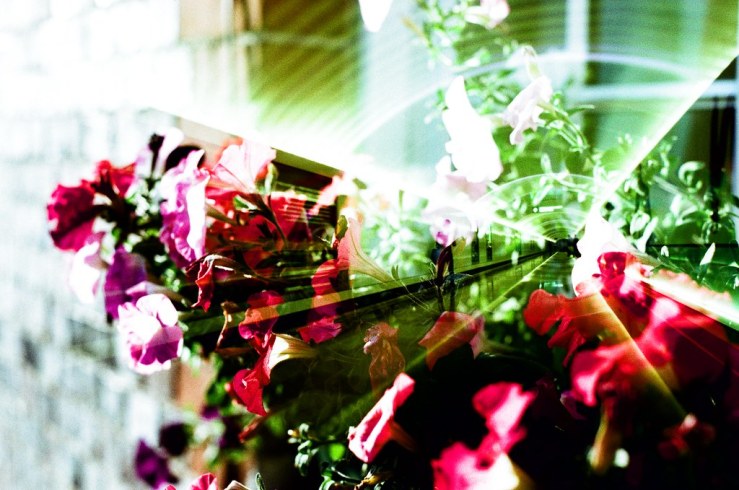
A great extension of this idea is a film swap, where you shoot the first layer, then rewind the film and send to someone else to photograph the second layer.
The two images below were both from film swaps.
Expose Both Sides
This is really a natural extension (or perhaps the wild lovechild) of the two previous experiments – redscale and one film two cameras.
You shoot the film straight, then respool it as redscale film, to then shoot the second layer.
Again a theme for each layer works well, and of course you don’t have to use two different cameras.
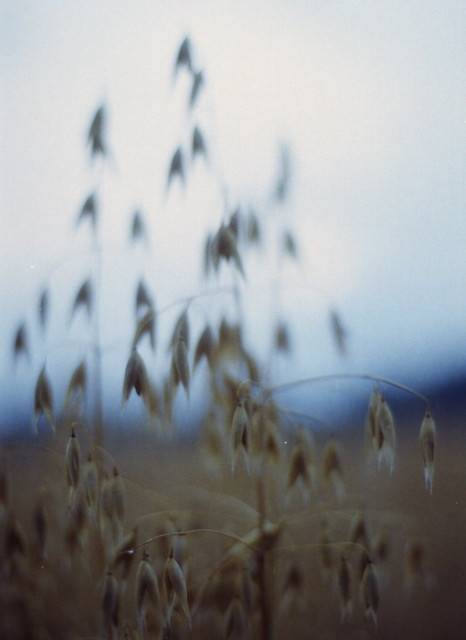
Over Exposed
This is as it says too, simply over exposing the film deliberately to wash out the colours and add a different feeling.
Whereas over exposed digital photographs generally look ghastly, with film you can achieve some very pleasing effects, without ruining the image.
I usually combined this with shooting a lens wide open – ie at its fastest aperture – which seemed to fit well for the dreamy, hazy look.
This shot was with a Pentax-M 50/1.7 lens and AfgaPhoto Vista Plus 200 film, and over exposed by three stops, so shot at ISO25.
Film Soups
Here the film is soaked in a soup of some kind. No, not tomato or minestrone, but any mixture of liquids and powders.
Those I tried most were usually based in lemonade or Lucozade, as these drinks altered the colours of the film, as well as providing artefacts on the final image due to the bubbles.
Washing up liquid, rum, and baking powder also featured in some of my film soup experiments.
The one golden rule here is to make sure the film is dried out completely before running it through your camera. Especially if your cameras are expensive and/or you’re precious about them!
I would usually submerge the film canister in the soup for anything from 10 minutes to a few hours, then shake off the surface liquid, before leaving the canister in a warm place like an airing cupboard or on a sunny window sill for at least a week, sometimes a month or two.
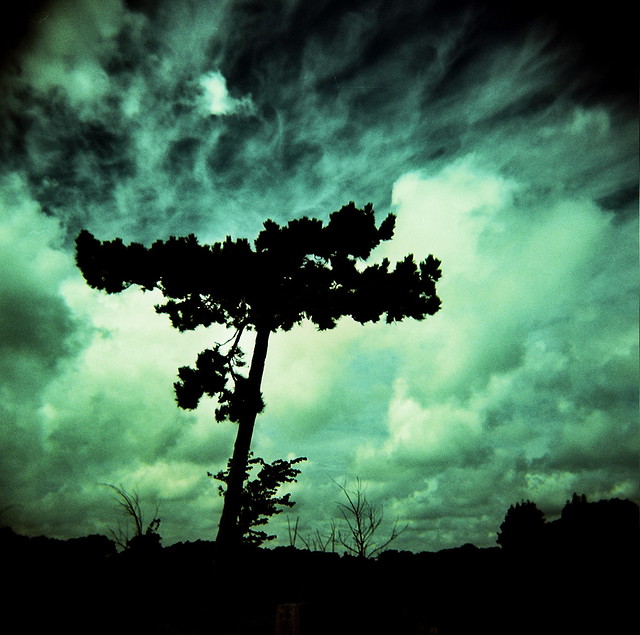
Depending on the combination, and how long you soak the film, the impact can be subtle or fairly radical, like the first photograph below, where the film was soaked in lemonade for an hour.
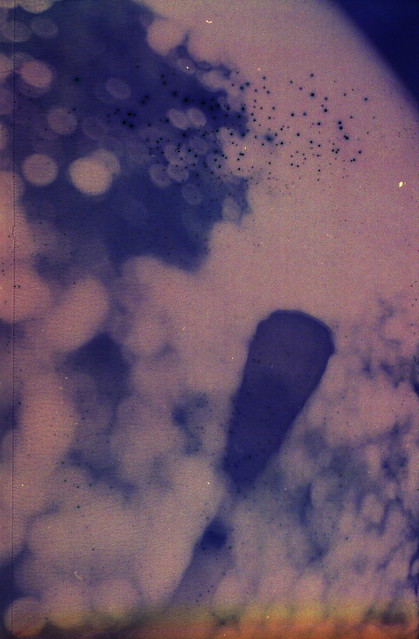
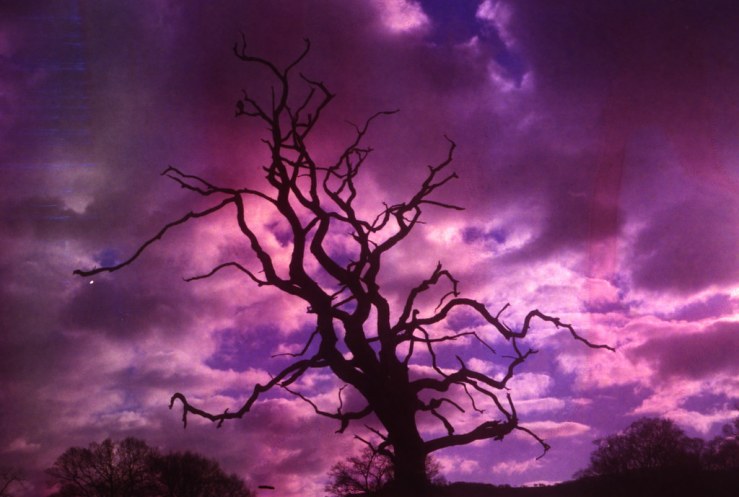
The intense purple shifts this next film exhibited came from an extended soak in dark rum.
Cross processing
This means developing the film in chemicals intended for a different kind of film. The most common variation here is shooting E6 slide film and processing with regular C41 colour negative chemicals.
I had some very interesting results with films like Kodak EliteChrome EBX, Fuji Velvia 50 and Agfa CT Precisa.
In summary
For me one of the joys of the physicality of film was that you could experiment with it literally with your bare hands, whereas with digital, virtually all experimentation of this kind is done in the brain of a computer (whether in the camera itself, or in post processing afterwards).
Redscale, Expose Both Sides and Film Soups especially felt a natural extension of the magical chemistry already inherent in film.
I’ve tried a few similar attempts digitally, but it just leaves me cold. It’s a bit like typing a letter to a loved one in Times New Roman on a computer, rather than writing by hand in your own handwriting, with all of its quirks and smudges.
With digital I’d rather shoot in a cleaner, more unaltered way, with the minimum of digital trickery and finnickery.
How about you? Which kinds of film treatments and experiments have you tried and enjoyed?
Please let us know in the comments below (and don’t forget to tick the “Notify me of new comments via email” box to follow the conversation).
Thanks for looking.
What Next?
Share this post with someone you think will enjoy it using the buttons below.
Read a random post from the archives.
See what I’m up to About Now.


Very interesting results Dan. The dark rum shot is my favorite. I remember seeing a very good photograph that resulted from someone accidentally running the roll through the washing machine in her pants pocket. I can’t say I’ve tried any of these, but did experiment with some of the art filters on my Panasonic LX7 and didn’t care for them. The results looked too contrived for me, although I did take on of my favorite portraits ever using the ‘toy camera’ setting when I first got it.
The washing machine treatment is a good way of souping film, you get the effect of the water, detergent, and heat all at once! Never tried it, but having tried washing up liquid I imagine the effect would be similar.
I know exactly what you mean about contrived results on digital. Even though with these kind of film treatments the result is obviously not a natural look, I still liked that it was physical and organic, not merely a computer shaking up its bits, so to speak. That said, I have on occasion played with more experimental filters with Hipstamatic and Snapseed and enjoyed the results, even if it’s not something I’d use for the majority of digital shots. Sometimes we get lucky with the effects that have a random/shuffle button!
The only cross-processing I’ve done was when I found a couple of rolls of Ilford XP-2, a C41 B&W film, in my desk drawer after the only local minilab shut down. I shot them at box speed and developed them with my usual B&W chemicals. It’s a nice sharp, low grain, medium contrast film used that way albeit a very expensive one.
Thanks Doug. Yes there are all kinds of other variations of cross processing. I only tried the slide film with C41 developing originally because I had some slide film but the processing was too difficult to find and then too expensive. So I tried a roll developed in a local C41 lab, liked the results so tried it again periodically. A kind of ongoing happy accident!
I wish I could gin up some enthusiasm for alternative treatments. I have a roll of Lomochrome Purple that I am not sure I’ll ever get around to shooting. I’m at a place were I’m narrowing in on the films I go to. For color it’s going to be Fujicolor 200. I’m not sure in b/w yet, maybe Fomapan 200, maybe Ilford FP4+. And then I think it might be time to pull way back on experimenting, and just get on with making great images.
Fuji C200 is my go-to for colour as well, and at the moment I am shooting mostly Fomapan 100 but keen to try the 200 and 400 variants! I have 3 rolls of Lomo Purple left in 35mm that I am hoarding because I love the stuff. I feel like it gives interesting colours without going overboard, if you overexpose it.
Overexposing redscale can give similar effects to the Lomo Purple, if a little different palette wise. Yeh I used absolutely loads of C200/ AfgaPhoto Vista Plus 200, it just delivers lovely, slightly saturated but still natural colours, and for a long time the latter was available at £1 a roll in Poundland!
I understand Jim, and in my later days of shooting film, I nearly always used Fuji C200/ AgfaPhoto Vista Plus 200 or Fuji Superia 100. Earlier on though I loved the freedom of all these different kinds of experiments. Shooting film with all the different emulsions, then discovering these different treatments too, was like falling into Willy Wonka’s Chocolate Factory…
I have no judgment to offer anyone who likes the experimentation. I really reveled in it in days gone by. It’s just that now I just want to get on with making great photos, and for me that means knowing my films well.
Most of my double exposures have been accidental! And I have only done cross processing a few times. I really want to experiment more with photography though because my “normal” images feel so boring to me at the moment. Because I’m lazy, I’ll probably just buy some ready-made redscale film 🙂
Mel, redscale is easier than you might think. You just need to sacrifice a canister the first time, then you can re-use the canister you take the film from each time. If you try redscale I would recommend trying a range of exposures to see the different intensity of effect. Shooting at box speed will usually give very red/orange results, but shooting two, three, four stops over can give some very subtle tones that just shift enough from standard colours to ass another layer of interest, in my opinion, like the chain link fence photo I posted above.
Cool maybe I’ll try it with one of my rolls of C200, I still have about 20 of them!
Let me know how it goes Mel!
Also, Dan, get a film camera already so we can do a film swap! 😀
Well, I do still have a couple of film cameras, so you’ve got me thinking… 🙂
It used to be a ‘thing’ to make double exposures by holding the rewind button down while cranking the film advance. Solarization of prints, sandwiching negatives … all that work for random results.
It’s easier with digital. Less expensive too.
Thanks Marc. I just like the more hands on and physical aspect doing this kind of thing with film. I don’t know, with digital it feels so detached as it’s all, well, digital, just altering ones and zeros.
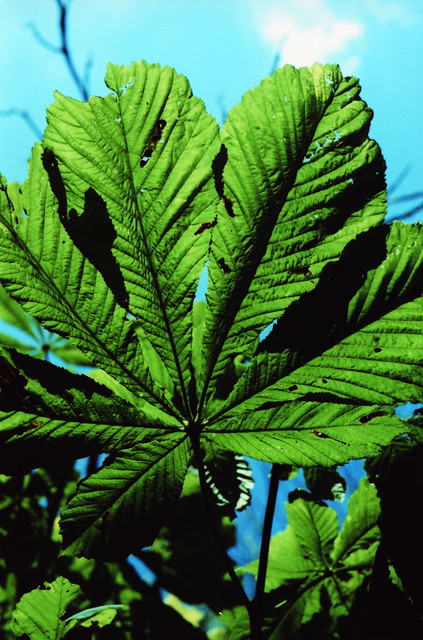
I love the green tunnel and flowers one, that’s great! (And your post has given me an idea for something.) Some of your results of photos in this post remind me of experiments with instant polaroid photos – before and during the developing process, the emulsion could played with… Also you could change the colour by allowing it to develop in different temperatures. This was particularly with the earlier ones that had a peel-off strip rather than the ones that just popped out of the camera complete.
As for digital effects, yeah – not too good, but for me mostly because ‘anyone’ can do them so there are a lot of very samey results out there. What I do like to do (for my own fun) sometimes,though, is scan a photo, put it in my graphics program and turn on a filter I rarely use for its real purpose (as I like to do it manually inside the program instead) which is ‘remove dust and scratches’ and deliberately overdo the filter intensity. That actually adds some interesting effects that wouldn’t be seen with the default filters.
Val, thanks, that one was the result of an international film swap with a guy in Hong Kong I think, a few years back. I’ve seen some really cool Polaroids that have been treated or damaged in some way, and yes peeling them apart to different degrees seems to give a wealth of unpredictable outcomes.
I struggled for ages (perhaps three or fours years) to try to make my digital photos taken with my Son NEX and vintage lenses look like film photographs made with the same lenses. I used various presets in LightRoom, then added my own tweaks, but just hated how long I was spending and how many (infinite!) options there were. Then I got into Hipstamatic, and later, Snapseed, and found once I’d set up a few presets, I could just add them to photos in a matter of seconds, and they looked better than most of those I’d done in LightRoom.
For most digital compacts I use the on board b/w mode, then have a Snapseed b/w preset to add contrast and tweak the brightness sometimes, which gives them more drama. I dislike b/w photos that are all mid-greys, which most cameras tend to output by default. Except those like some of the Lumix models with their Dynamic Mono modes, fantastic!
What your describing about the dust and scratches and changing filter intensity sounds similar in principle to what I do now and then with Snapseed, which has tools like “Vintage” and “Retrolux” which give a good starting point, and both of these have further options. I love the Retrolux for a quick way of taking a standard modern looking photo and making it look like a damaged old Polaroid, especially with the “random” button it has. Good fun when photography’s got too serious!
I’ve not got Lightroom but presume it has much the same controls as Photoshop, so can you use RGB levels (individually) on digital photos? That’s what I use on digital colour photos to make them pop.
Oh, monochrome mid-tone greys are the pits! Some while ago I tried some b&w and then colour on photos near our pond, just to get an idea of what it’d look like monochrome and was horrified to see how dull it all was. Then I adjusted it in the program and – much better!
I don’t use LightRoom anymore, just went right off Adobe and the way they stopped you being able to buy a product once, instead chaining you in with a monthly subscription. I was paying £10 a month for years for an app I was using about 5% of its capability. I used Photoshop many years ago but only for making my own graphics for website headers and so on.
I sometimes use my Ricoh GRD III with its high constrast mono mode, but most of the time it’s TOO high contrast, even for my tastes. Very Daido Moriyama influenced I think.
Adobe has become a total pain in its attitude. This is the reason I still use Photoshop Elements (and an old version at that). I gather there’s a reasonably-priced (under 50 quid, I think) program called Affinity that is like Photoshop. I have been thinking of giving that a try.
I tried to open your link but was asked to log in! I did have a look at your main Flickr page, nice stuff there. I had a Flickr account for years but got rid of it when I gave up the associated email address. I’ll probably get another some time. Has Smugmug taken it over yet?
Sorry Val, that photo was set to private, try now –
I had a major Flickr reset a while back where I made everything (about 4500 photos) private so my public stream was empty. Then just added new stuff as it came, and now and then go back through older stuff and make public those I like best. I wanted to keep all the photos as a back up and to use in blog posts, but not have a crazy amount of public photos.
Yes, SmugMug now own it I beleive, and the best thing anyone has done with Flickr in years is allow any email address, which happened maybe six months back.
For years I had a silly Yahoo email address that I only used to sign in to Flickr, as that was all they would allow from the Yahoo-owned years.
That’s good, thanks! Oh yes, allowing any email address on Flickr is a good move.