
Returning to using a DSLR this month has reminded me how much more precise one has to be when exposing a digital sensor.
It’s also made me realise how much easier I had it when shooting film.
The vast majority of film I used was consumer grade colour negative film – Fuji C200 and Superia 100, Kodak Color Plus, Ferrania Solaris 200, plus rebranded variations.
Virtually all of these had the same exposure latitude of -1/+3.
What this means is even if you expose one stop under or up to three stops over the ideal exposure, you’ll still have a very usable negative.
Put another way, if you were shooting at an aperture of f/5.6 and the ideal shutter speed for the optimum exposure was 1/500s, you’d still get a decent image if your shutter speed was 1/1000s (-1 stop), 1/250s (+1), 1/125s (+2) or 1/60s (+3).
In my experience too, this was often a conservative guide.
I recall shooting a roll of ISO800 film in a Pentax compact camera, then at the end of the roll realising the film canister had no DX coding. The camera relied on this to set its ISO automatically, and if I couldn’t read the DX code, it defaulted to ISO25.
The difference between ISO25 and ISO800 is five stops!
But the pictures still came out pretty acceptable.
Because of this I generally leaned towards a stop overexposing anyway, giving me more flexibility – or in other words putting me closer to the middle of that -1/+3 stop latitude.
This amazing flexibility of colour negative film meant not only that any cameras with less than spot on metering were forgiven, but also that I could still risk another couple of stops wider on aperture in bright sunlight when the shutter speed of the camera had maxed out.
Which was very useful for someone who greatly enjoys shallow depth of field.
I have a basic grasp of exposure, and think I can tell when something is too over or under exposed, but with film I rarely had to call upon this understanding.
With digital exposures though, I’ve found it’s nowhere near as forgiving.
With a camera with a decent AE (Auto Exposure) system, you’ll probably rarely notice these tighter exposure tolerances, as with film.
With the majority of digital compacts I’ve used, as long as I’ve been careful with highlights (by avoiding brightly back lit scenes, and using -0.3 exposure compensation to further take the edge of), I’ve not thought much about exposure.
But returning to a DSLR – and especially when trying to use a range of different types of lenses with different levels of metering automation – has really highlighted (pun intended!) the fickleness of digital sensors.
I know many shoot RAW which has more tolerance, and they can then adjust the exposure in post processing.
But I’ve found time and time again, shooting RAW isn’t for me, so this isn’t a route I want to explore.
With JPEGs, the upside is their speed and convenience. The downside is it seems far more imperative to get the exposure right.
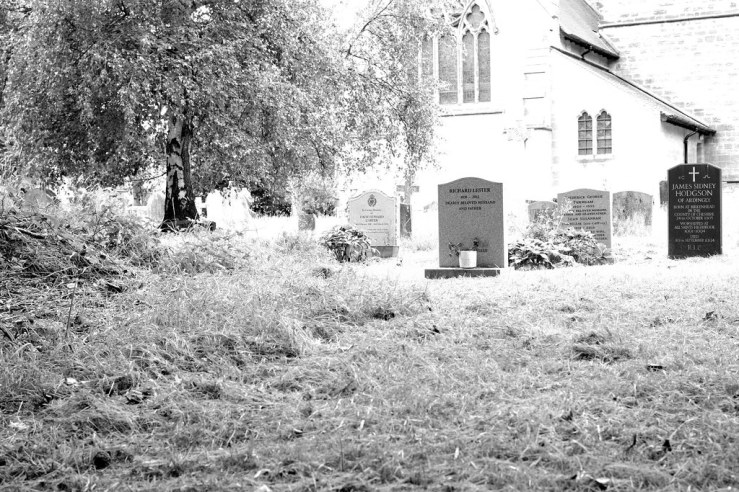
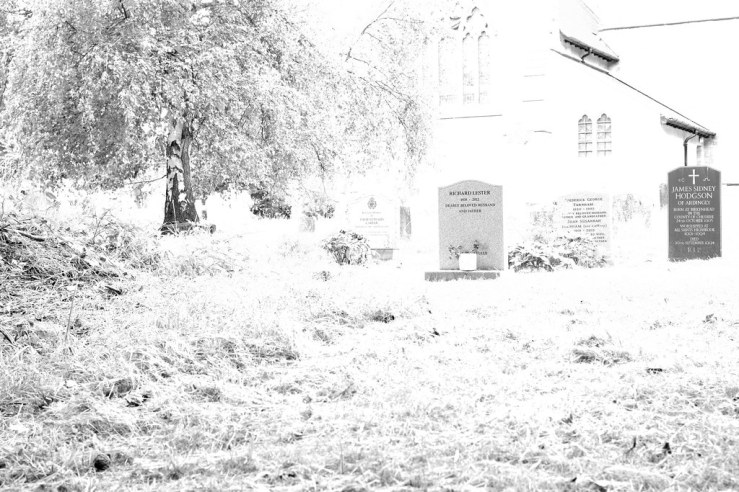
To illustrate the (lack of) exposure latitude of digital – to myself and you – I decided to take a series of photographs with my Pentax K30 DSLR that emulated the exposure latitude of colour negative film.
This was not a highly scientific experiment, more just a casual attempt to see and understand the outcome of varying exposure with a DSLR.
So I simply used the exposure compensation button to take pictures at -1, 0, +1, +2 and +3 stops.
Here are the results, and my notes beneath each.
On the upside of this digital intolerance perhaps is that you learn to be more precise and get the exposure right more often from the outset.
On the downside, this takes additional learning and practice and multiple shots that perhaps you aren’t interested in investing in, and would rather just shoot with usable exposures more often than not.
I think I’m more in the downside camp currently, than the upside.
So if you do shoot colour negative film, be thankful of this wonderful exposure latitude, which means you rarely have to think too much about getting a perfect exposure, the film will cover any minor shortcomings.
If you shoot digital and the vast majority of your images are exposed well, then congratulations on choosing a great camera, and/or having the skill to get the exposure right yourself manually.
What are your experiences of exposure latitude with film and digital photography?
Please let us know in the comments below (and don’t forget to tick the “Notify me of new comments via email” box to follow the conversation).
Thanks for looking.
What Next?
Share this post with someone you think will enjoy it using the buttons below.
Read a random post from the archives.
See what I’m up to About Now.

Oh I agree – shooting digital in difficult lighting is a P.I.T.A. – it’s more akin to shooting slides. The latitude you had with film was much easier.
The exp. comp. dial on my DSLR gets a lot of work!
Hi Stuart, thanks for your reply, glad it’s not just me!
Do you shoot on Program or Av and use the expsoure compensation rather than shooting manually?
It’s as broad as it is long really, either way you usually have to take an initial shot then gauge how much over/under it is, and adjust accordingly.
On my camera(s), exposure compensation is set to -0.3 by default, and often -0.6 or even -1. Any underexposure is easy to correct in post-processing. It’s one of the reasons why I cannot work very well with EVFs: they are often so overly bright that I get confused and start compensating even more. With an optical viewfinder I just trust my skills and that always works out well.
Thanks Robert. Do you shoot as RAW or JPEG? Do your settings change with different lenses on the same camera?
One of my photo mentors (a photojournalist) always said: “Life is too short for RAW” 🙂
If you want to keep post-processing as simple as possible, JPEGs provide more than enough quality to work with. Especially with modern cameras. It may indeed differ per lens, but my experience is that some underexposure is always necessary if you want to prevent clipping highlights.
Love that saying, my sentiments exactly!
As you probably recall, I like to use JPEGs straight out of camera where possible. With some cameras I then put them through Snapseed if they have no in camera contrast control etc. I guess I’d rather be tweaking the exposure while shooting then not have to do post process, and use the JPEGs straight from camera.
It’s just continually surprising to me that digital, with its supposed superiority, convenience, speed etc, over film, is actually harder work in many ways!
Coincidentally I recently did an experiment about just this: Dealing with (photo) disasters. My further experiments with film simulation echo the results. Print film has always had fairly good latitude; digital is more like slide film, which is not so forgiving being direct-to-positive.
And I still find it curious that DSLRs have minimum ISO of 100 and then go off the crazy scale from there. Funny how we managed to shoot with ‘slow’ film all those decades, eh?
Thanks Marc, I’m reassured you’ve experienced similar.
I think I’ve had a couple of cameras with ISO50 as the minimum, but yeh usually it’s 100, even 200, and up to silly numbers, that I can’t see when people use, unless they’re shooting in complete darkness!
The slowest film I’ve used was Kodak Vision 3, rated at ISO 1.6. Yes that’s not a typo, one point six! Gave some memorable results too…
I think this is why I prefer shooting during bright overcast days. The light is more even so exposure is easier. However I have this way of thinking with both digital and film. Film is definitely more forgiving, thank goodness! I exposed a roll of Lomo Purple THREE times once and still got very good images out of it – phew!
Film is super tolerant! I couldn’t believe that rol I mentioned above, shooting ISO800 film at ISO25 by mistake and still get usable images. This kind of incident gave me great confidence in shooting “Sunny 16” with manual cameras, though I always adapted it a stop to Sunny 11, given most films happiness with overexposure more than under.
I do enjoy how I can exposure-abuse a roll of Fujicolor 200 and still get usable results. That said, with the auto-ISO, auto-exposure features on modern digital cameras I just have little trouble getting the shot.
I don’t often use Auto ISO, or when I have it’s been over a limited range like 100-400. I just don’t like having another variable, I miss the simplicity of loading one roll of film with a set ISO and then having to commit to it.
Plus with digital my general rule is minimum ISO (usually 100) for colour shots, ISO400 for b/w to add a little extra atmosphere/texture.
[…] Shooting Superia 100 helps you develop a better understanding of exposure settings. Its flexibility compared to digital cameras (which are less tolerant of mistakes) encourages you to experiment and refine your technique [6]. […]